
Wisp Science基础入门:快速开始
查看原文第一次使用 Wisp Science,不必一开始就配置服务器、浏览器和各种科研工具。先下载安装,走完首次引导,创建一个练习项目,再发送一条能核对结果的小问题,就能确认最基本的使用流程是否畅通。
这篇教程带你完成从下载到第一次对话的过程。你只需要一台电脑,以及一个可以使用的模型 API 接入;暂时没有 API Key,也可以先安装应用、浏览界面和内置演示。
本文截图来自 Wisp Science 实际前端,使用模拟配置和教学回复。图中的路径、项目及回答用于说明操作,不代表已验证真实 API 账号。不同版本的界面文字可能略有差异。
第一步:选择适合电脑的安装包。
打开 Wisp Science 下载页,选择操作系统、芯片和安装格式,再点击“从 Cloudflare 下载”。页面会显示版本号、文件大小与安装方法;Mac 用户请在“关于本机”中确认是 Apple Silicon 还是 Intel。下载不可用时,可使用页面上的 GitHub 备用入口。
安装包名称中的版本号会变化,使用 GitHub 备用下载时,在 Assets 中主要看文件末尾的架构与格式:
| 电脑类型 | 在 Assets 中寻找 | 下载后怎样安装 |
|---|---|---|
| Windows,Intel/AMD 64 位电脑 | …_x64-setup.exe 或 …_x64_en-US.msi |
选择其中一种,双击后按安装向导完成安装 |
| Mac,Apple Silicon(M 系列芯片) | …_aarch64.dmg |
打开 DMG,将应用拖入“应用程序”,再从“应用程序”启动 |
| Mac,Intel 芯片 | …_x64.dmg |
同样通过 DMG 安装到“应用程序” |
| Linux,Intel/AMD 64 位 | …_amd64.deb 或 …_amd64.AppImage |
Debian/Ubuntu 系发行版可用软件安装器打开 DEB;AppImage 需设为可执行后运行 |
| Linux,ARM64 | …_arm64.deb 或 …_aarch64.AppImage |
选择与发行版和架构匹配的格式安装或运行 |
Mac 不确定芯片类型时,可以打开苹果菜单中的“关于本机”查看。其他系统也应先确认自己的系统架构,再选择对应文件;实际可下载的构建以发布页为准。
第一次安装不需要下载 Source code (zip)、Source code (tar.gz)、.sig、latest.json 或 .app.tar.gz:这些是源码、签名或更新相关文件。选择上表中的桌面安装包即可。
安装完成后打开 Wisp Science。第一次纯文字对话不需要你先安装 Rust、Python 或 R。
第二步:跟着四页首次引导了解应用。
第一次启动会显示引导窗口,按底部按钮逐步继续。
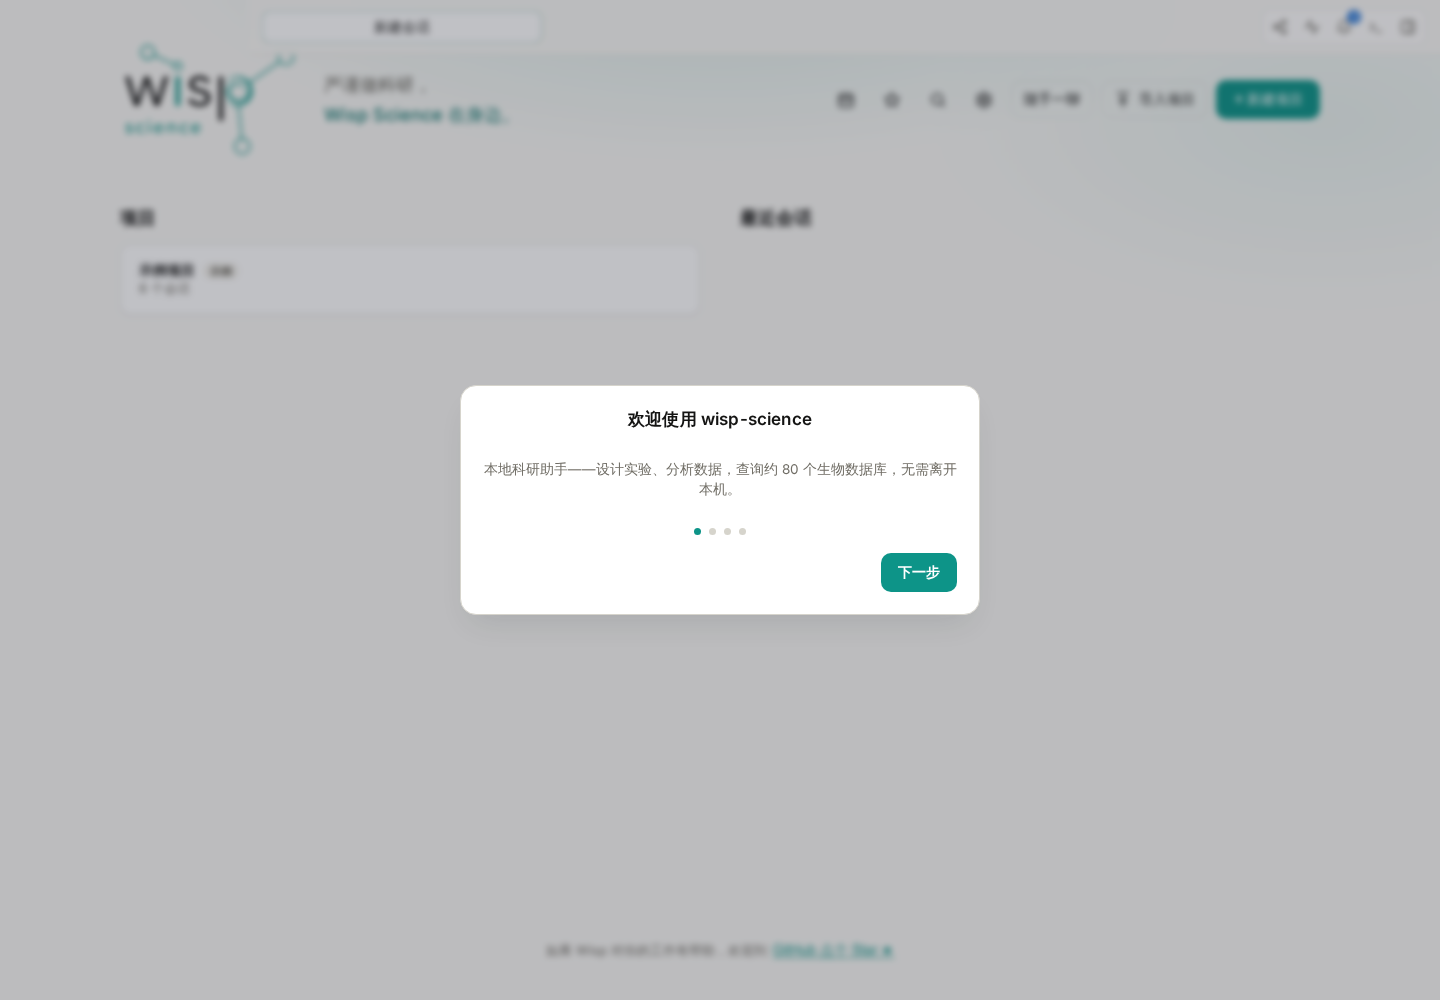
图 1:欢迎页是起点。点击“下一步”继续;底部圆点显示当前所在步骤。
第二页介绍 Wisp 能做什么:围绕项目与模型对话,运行分析、使用科研工具,以及查看文件和结果。先知道这些入口存在即可,不需要此时全部配置。
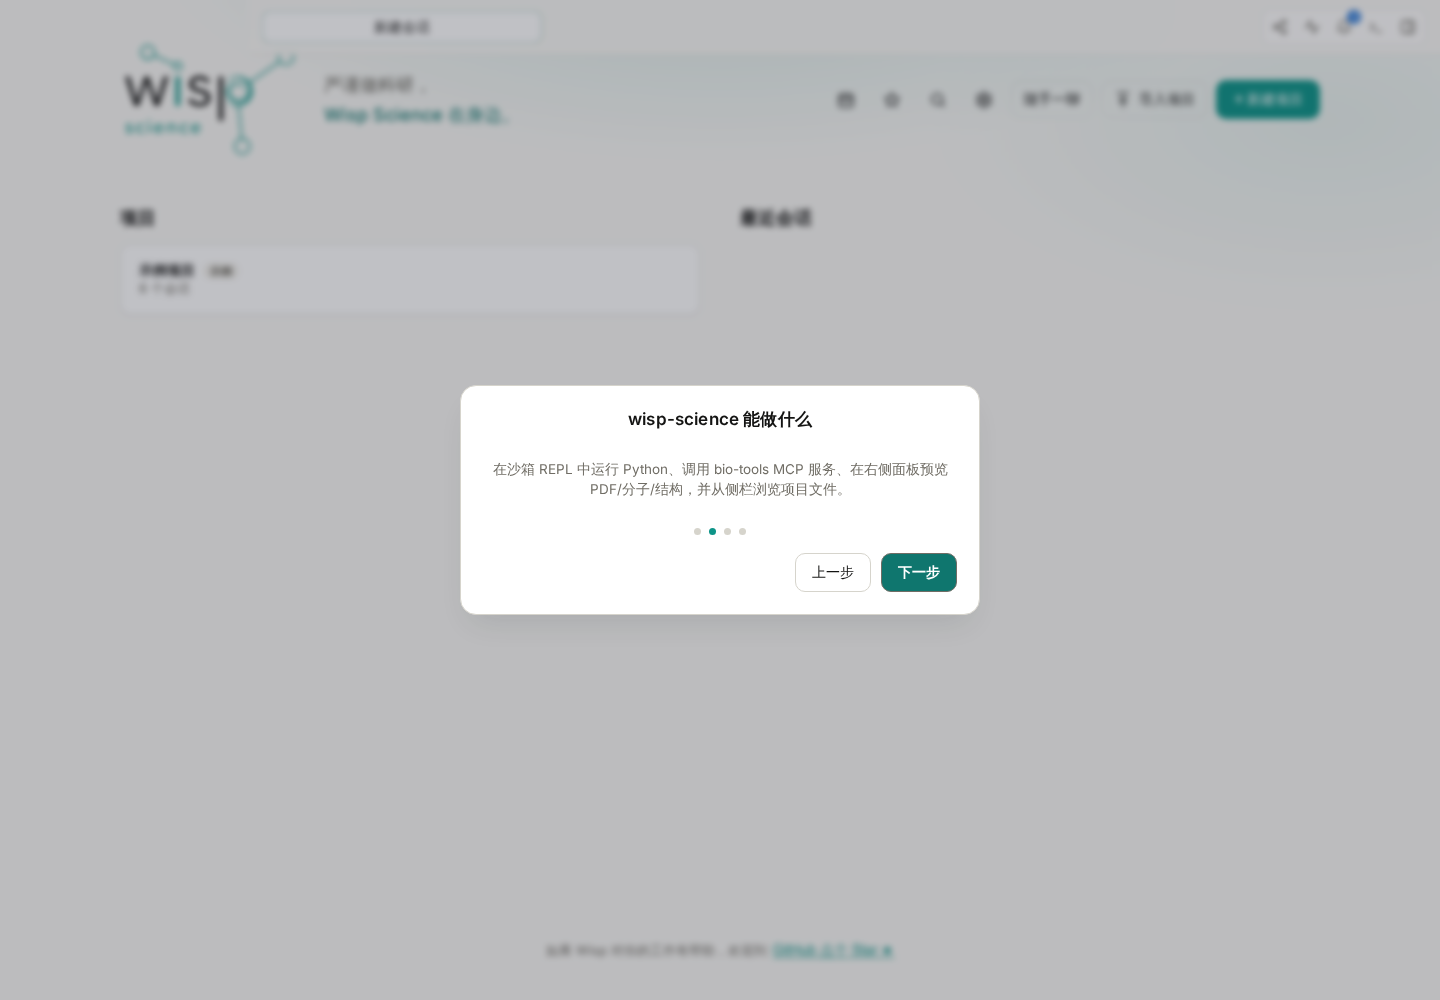
图 2:功能介绍帮助你认识工作台。第一次练习先完成普通对话,之后再逐步使用分析和检索能力。
第三页是 配置模型。当前引导提供 DeepSeek 的快捷配置:使用自己的 API Key,按页面提示保存并继续。API Key 需要从模型服务商的控制台获取,不是网页登录密码。
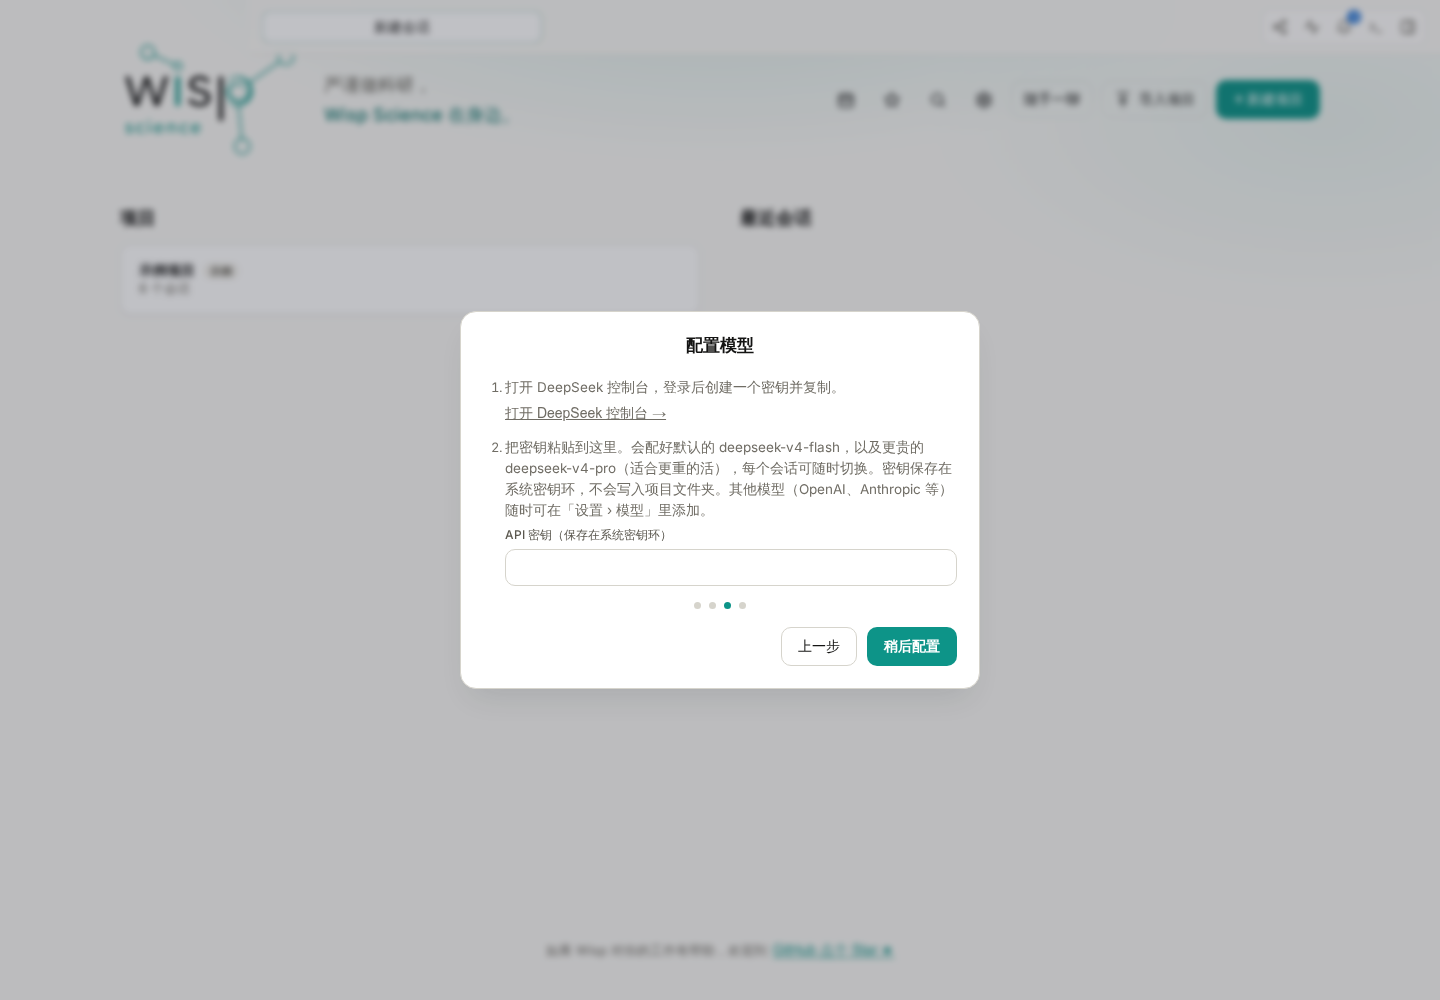
图 3:在自己的电脑上填写真实有效的 API Key,截图不展示密钥。当前引导中的快捷入口面向 DeepSeek,其他模型可稍后在设置中添加。
如果准备使用其他服务商或实验室网关,点击 稍后配置。进入应用后,前往 设置 → 模型 → 添加 API 接入,填写对应地址、协议、模型 ID 和密钥。详细字段见模型配置教程。
继续下面的对话测试前,请确保至少配置了一个可用模型。 跳过引导中的密钥配置,可以浏览应用和内置演示,但不会自动获得模型 API 访问权限。网页聊天账号是否包含 API 权限,需要以服务商说明为准。
第四页是 本地环境(可选),用于检查这台电脑上的 Python、R 等工具路径。
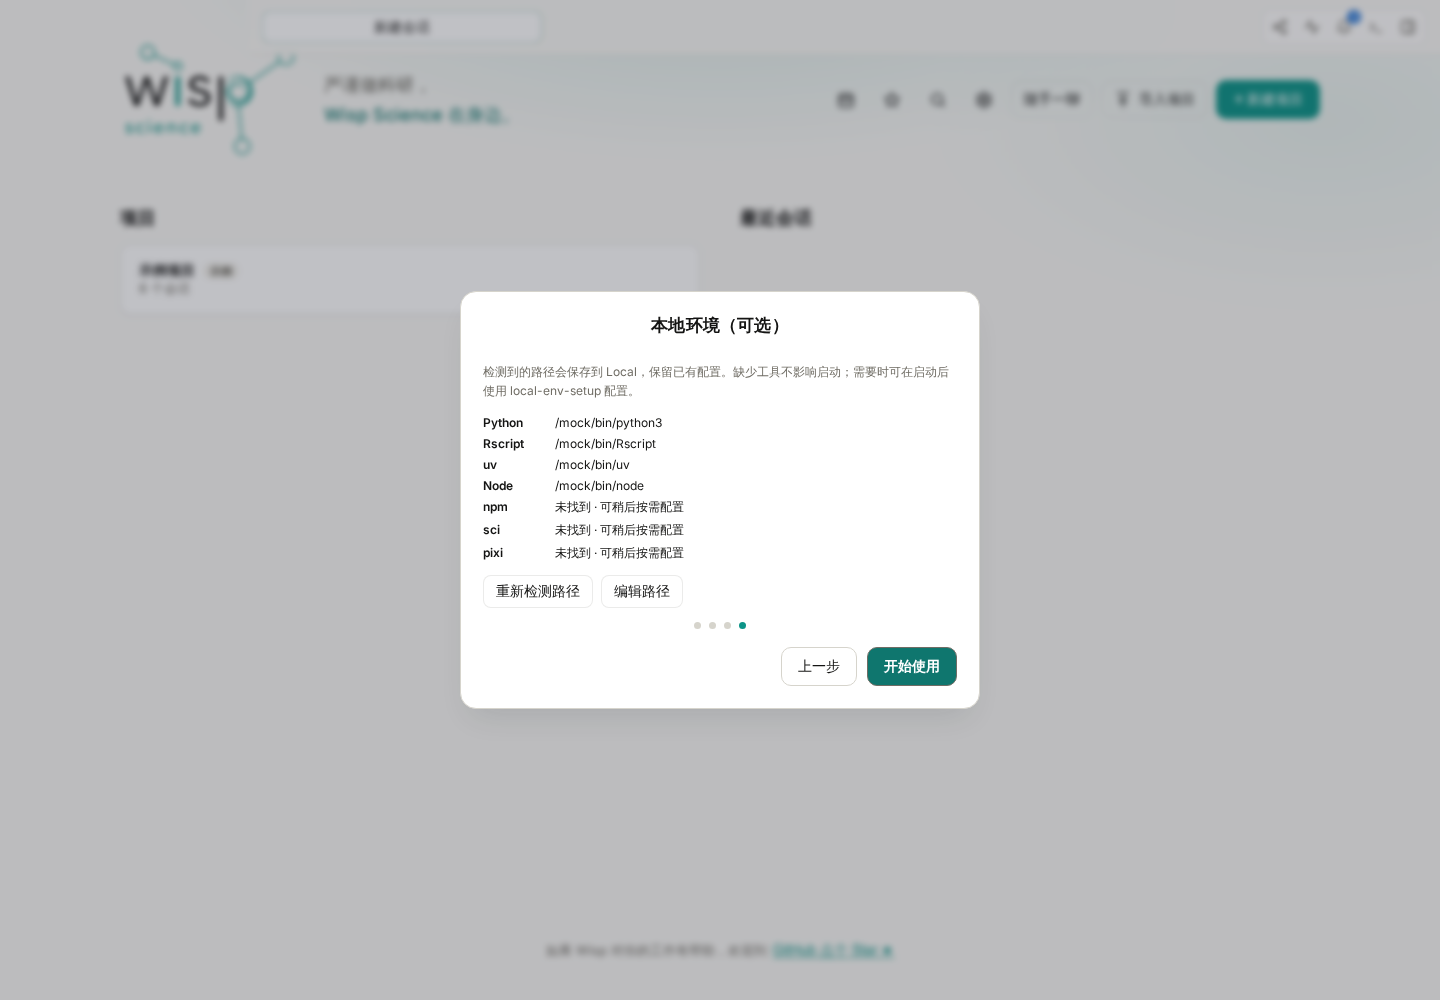
图 4:工具路径会显示检测结果。这里的路径来自演示环境,不要照抄到自己的电脑上;缺少工具不影响完成本篇的纯文字测试。
已经安装的工具可以自动检测;路径不对时,可以点 编辑路径。如果暂时没有安装 Python 或 R,也可以先点击 开始使用,等真正需要运行分析时再配置。引导页不会自动替你安装所有工具。
想重新查看引导时,按 Ctrl+P(macOS 为 Cmd+P),搜索 快速配置。重新打开不会清空已有项目。
第三步:创建一个练习项目。
完成引导后,你会看到项目首页。项目用来组织这一项工作的会话、文件与结果;可以把第一次练习单独放在一个项目中。
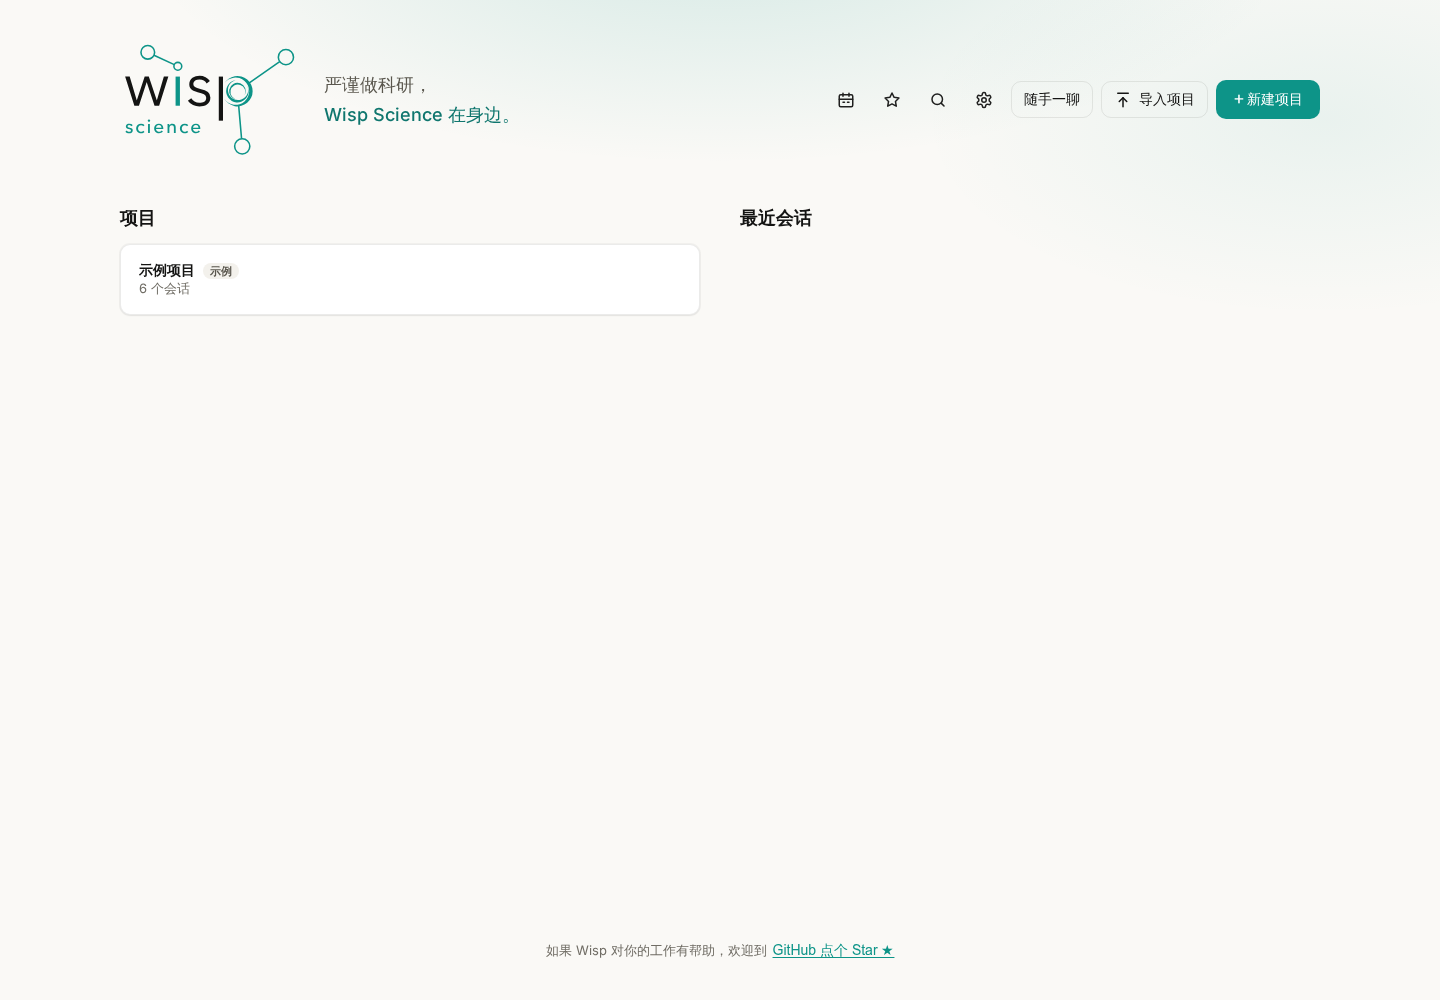
图 5:截图中的项目是演示数据。新安装时,你的项目列表可能为空,也可能先看到内置示例入口。点击“新建项目”创建自己的练习空间。
点击 新建项目,填写名称,例如 第一次使用 Wisp,再选择一个准备存放练习内容的本地文件夹。建议使用专门的空文件夹,方便找到后续生成的文件。
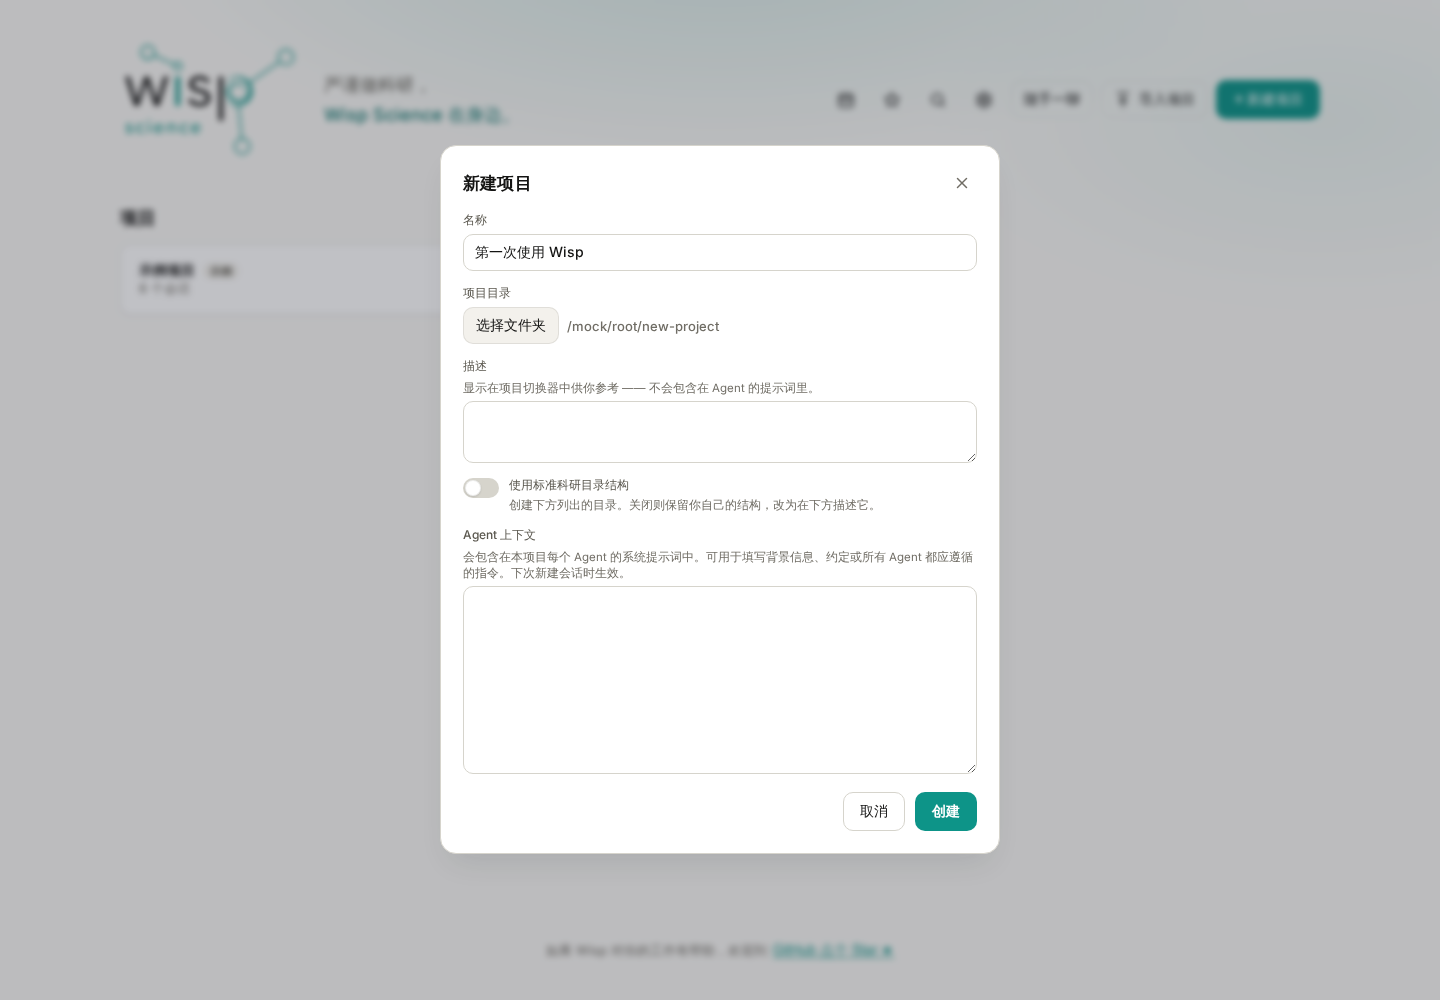
图 6:名称方便你在 Wisp 中识别项目,目录决定文件实际存放的位置。截图中的 /mock/root/new-project 是模拟路径,请选择自己电脑上的文件夹。
其他字段和目录结构选项可以先保持默认。确认名称和目录后点击 创建。进入项目后,左侧是会话列表,中央是对话区,底部是输入框。需要开始一段新的讨论时,点击左侧 新建会话。
如果暂时没有 API Key,也可以先打开项目首页提供的内置演示,阅读已有记录;继续发送自己的问题仍需要配置可用模型。
第四步:选择模型,发送第一条测试消息。
在输入框附近的模型选择器中,确认当前选择的是自己配置的可用模型。如果没有可用项,先回到 设置 → 模型 完成配置,再返回会话。
把下面这段话复制到输入框,点击 发送:
这是我的第一次对话测试。请把样本 A=10、B=20、C=30 整理成表格,并告诉我样本数和平均值。只根据这些数字回答,不读取文件、不运行代码、不访问网页。
这个例子不依赖额外的数据文件或科研工具,能帮助你先确认消息发送、模型响应和表格显示是否正常。
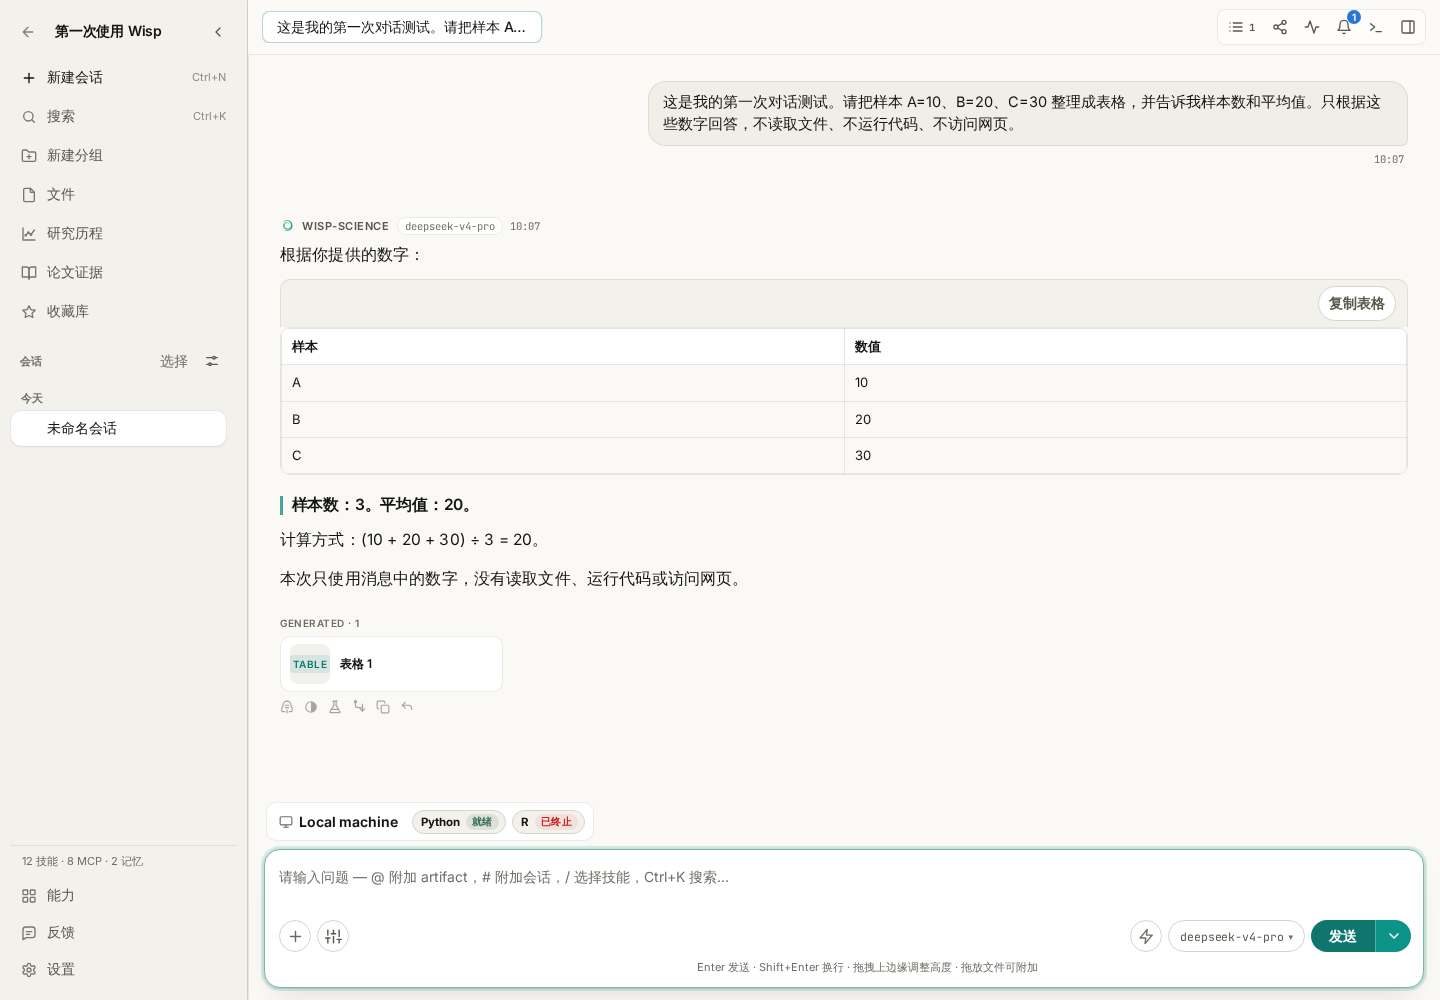
图 7:这是模拟模型回复的界面示例,用于展示成功回答应出现在哪里。你实际收到的措辞可以不同,但数值应能核对。
检查下面几项:
- 对话区出现了你刚发送的问题。
- 助手给出了完整回复,而不是一直停留在运行状态或错误提示。
- 表格对应 A、B、C 三个样本,数值分别为 10、20、30。
- 样本数为 3,平均值为 20,即
(10 + 20 + 30) ÷ 3。
回复不必与截图逐字一致。如果算错或漏了样本,可以继续要求它核对原始数字。模型能返回文字与结果正确,是需要分别检查的两件事。
这次测试只验证基本对话流程,还没有验证文件读取、Python/R、网页检索或服务器计算。后续可以打开轨迹教程,学习怎样检查工具是否实际执行。
遇到问题,先检查最靠近当前步骤的配置。
| 现象 | 优先检查 |
|---|---|
| 下载后找不到可安装的应用 | 是否误下了源码或更新文件;安装包是否与系统架构匹配 |
| 引导里没有自己的模型服务商 | 选择“稍后配置”,再到“设置 → 模型”添加接入 |
| 输入框附近没有可用模型 | 模型配置是否保存,当前会话是否已选中它 |
| 返回 401/403 | API Key、模型访问权限和账号状态是否有效 |
| 返回 404 或网页内容 | API 地址、协议和模型 ID 是否配套 |
| 一直连接失败或超时 | 网络是否能访问模型服务;检查“设置 → 常规 → 网络”中的模型 API 代理 |
| 本地环境提示缺少 Python/R | 可以先完成本篇纯文字对话;运行代码时再配置相应环境 |
完成第一条对话后,就可以根据自己的任务继续学习:模型配置用于补充接入,浏览器使用用于读取网页,MCP和 Skills用于连接科研工具与复用工作方法。希望在其他机器上分析时,再阅读服务器环境配置。
安装包以 官方发布页 为准;引导与设置细节参见 Wisp 基础配置。本文示例用于练习操作,不代表已经完成的真实模型测试或科研分析。
You do not need to configure servers, browser access, and every research tool before using Wisp Science. Install the app, complete the welcome guide, create a practice project, and send a small question whose answer you can check. This establishes that the basic workflow works.
This tutorial takes you from downloading the app to your first conversation. You need a computer and access to a working model API. Without an API key, you can still install the app, explore its interface, and read the bundled demonstration.
Screenshots show the real Wisp Science frontend with simulated settings and a teaching reply. Paths, projects, and answers illustrate the workflow; they do not demonstrate a verified live API account. The screenshots use the English interface. Labels may vary between versions.
Step 1: Choose an installer for your computer.
Open the Wisp Science download page, choose your operating system, processor and package format, then select Download from Cloudflare. The page shows the version, file size and installation steps. On a Mac, check About This Mac to choose Apple Silicon or Intel. Use the GitHub fallback if the download is unavailable.
The version number in the filename changes. Look for the architecture and file extension:
| Computer | File to find in Assets | Installation |
|---|---|---|
| Windows on a 64-bit Intel or AMD processor | …_x64-setup.exe or …_x64_en-US.msi |
Choose either installer, double-click it, and follow the setup wizard |
| Mac with Apple Silicon, such as an M-series chip | …_aarch64.dmg |
Open the DMG, drag the app into Applications, then launch it from Applications |
| Mac with an Intel processor | …_x64.dmg |
Install into Applications using the DMG |
| Linux on a 64-bit Intel or AMD processor | …_amd64.deb or …_amd64.AppImage |
On Debian/Ubuntu-based distributions, open the DEB with the software installer; make an AppImage executable before running it |
| Linux on ARM64 | …_arm64.deb or …_aarch64.AppImage |
Choose the package format and architecture appropriate for your distribution |
On a Mac, About This Mac in the Apple menu identifies the chip. On other systems, check the system architecture before choosing a file. The release page determines which builds are actually available.
For a first installation, you do not need Source code (zip), Source code (tar.gz), .sig, latest.json, or .app.tar.gz. These are source, signature, or update-related files. Choose a desktop installer from the table.
Once installed, open Wisp Science. This tutorial's text-only conversation does not require installing Rust, Python, or R first.
Step 2: Follow the four onboarding pages.
The first launch displays a welcome guide. Use the button at the bottom to continue.
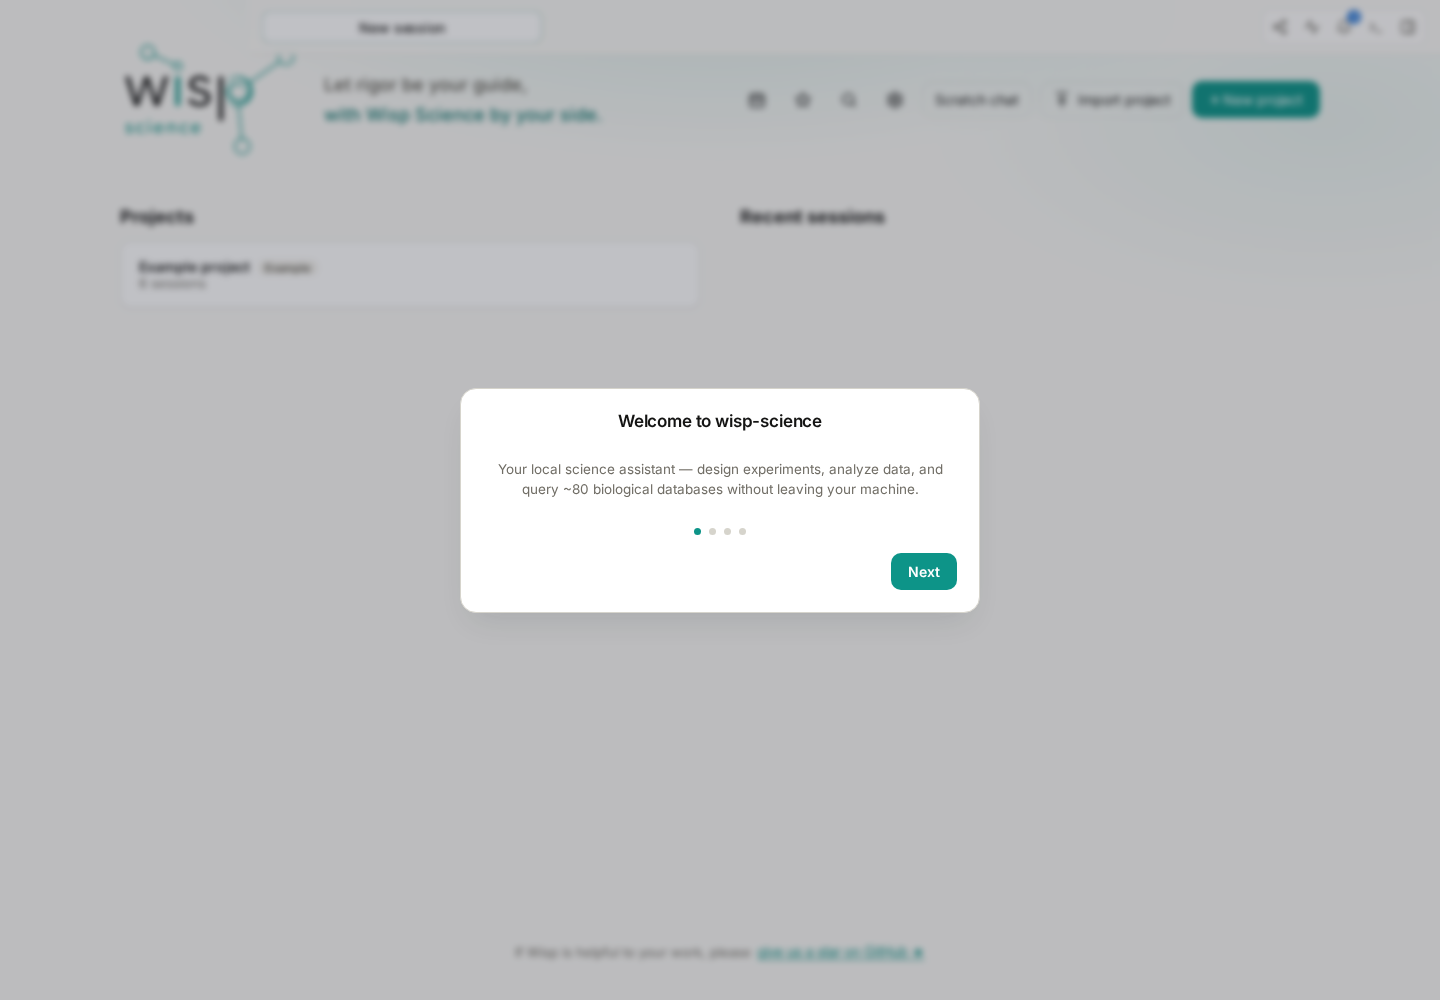
Figure 1: Start on the welcome page and click Next. The dots show your current step.
The second page introduces project conversations, analysis, research tools, and file previews. You only need to know that these capabilities exist; you do not need to configure all of them now.
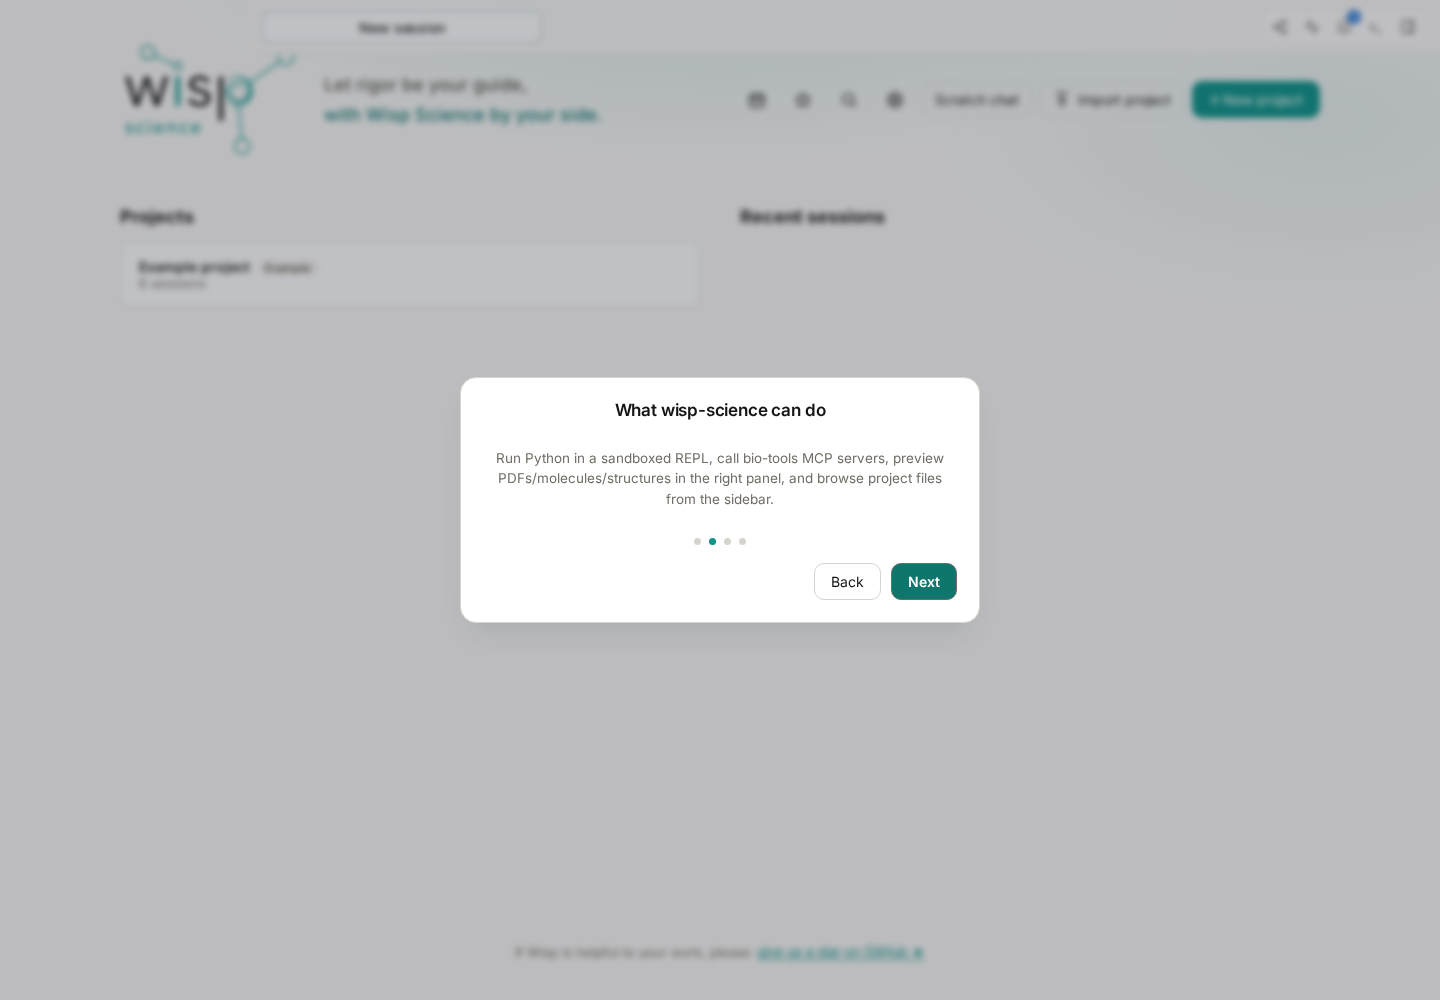
Figure 2: The feature introduction outlines the workbench. Start with an ordinary conversation, then explore analysis and retrieval.
The third page is Set up your model. The current onboarding shortcut uses DeepSeek: enter your own API key and follow the prompts to save it and continue. Obtain the key from your model provider's console; it is not your website login password.
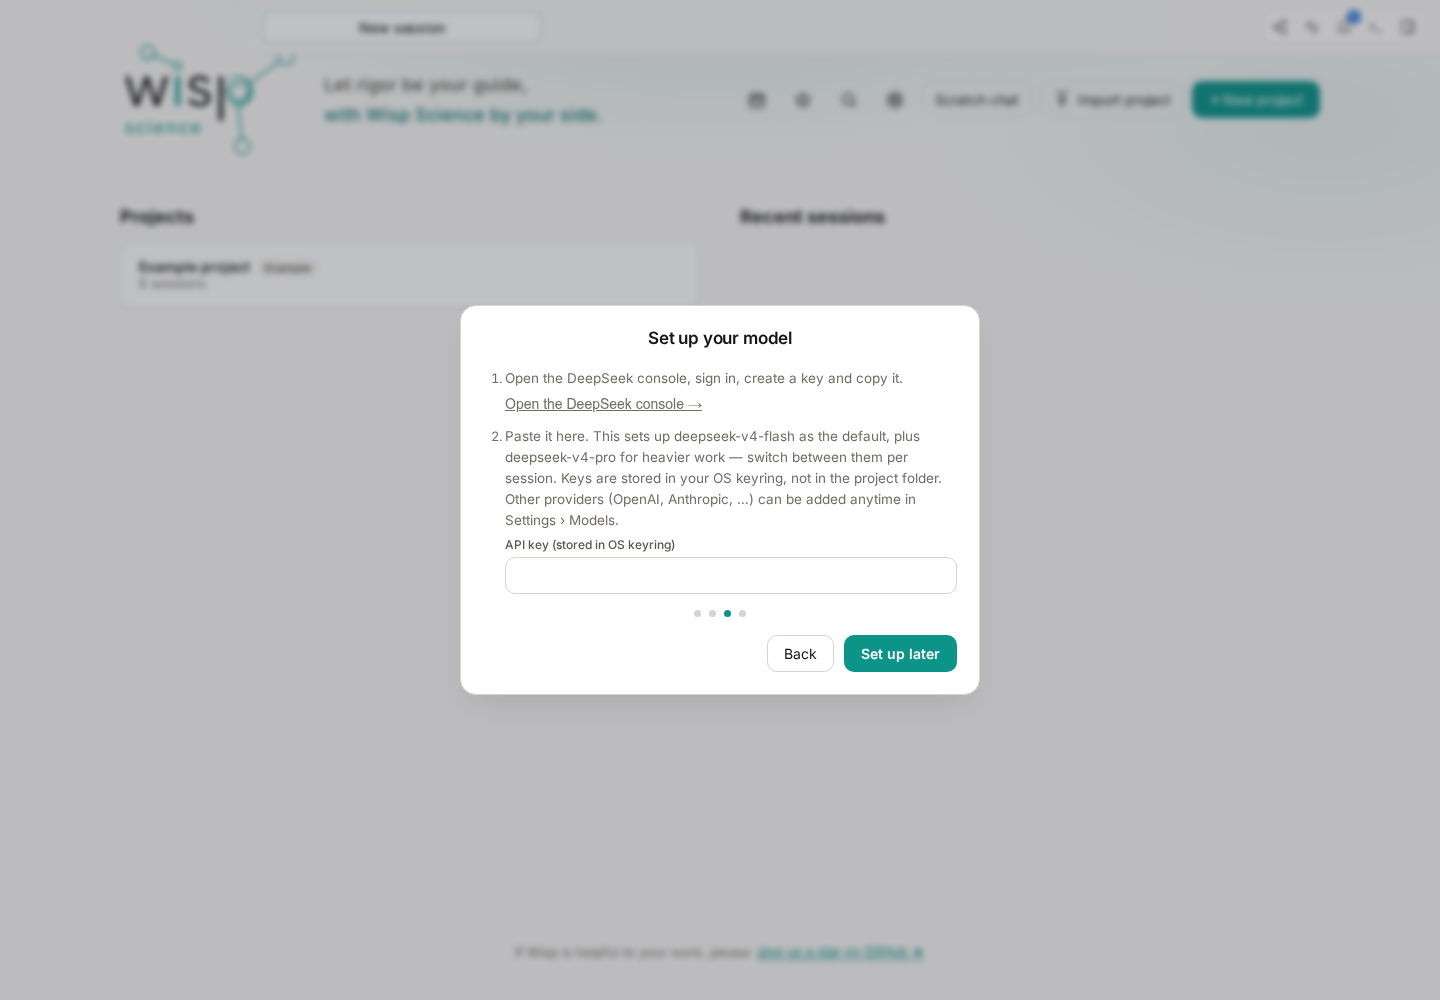
Figure 3: Enter a valid API key on your own computer. No key is shown in the screenshot. This onboarding shortcut is for DeepSeek; add other providers later in Settings.
For another provider or a laboratory gateway, choose Set up later. Then open Settings → Models → Add API access and enter the address, protocol, model ID, and key. See the model configuration tutorial for field details.
Configure at least one usable model before attempting the conversation below. Skipping the key lets you explore the app and its demonstration, but does not give you API access. Whether a web-chat account includes API access depends on the provider.
The fourth page, Local environment (optional), checks paths to tools such as Python and R.
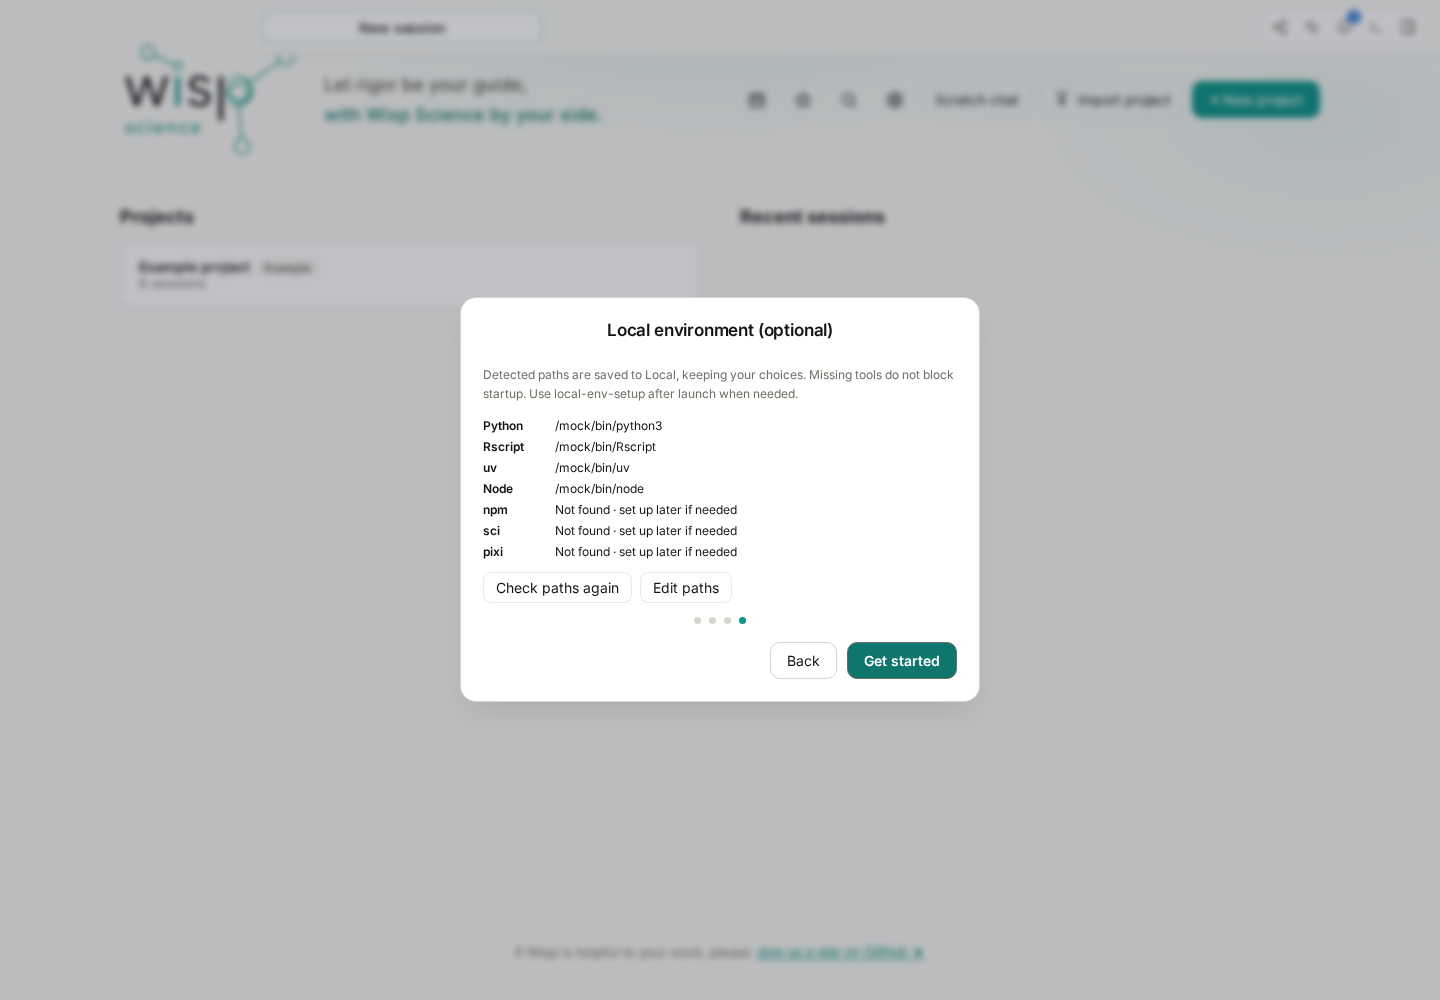
Figure 4: Detected tool paths appear here. These are simulated paths, not values to copy. Missing tools do not prevent this text-only test.
Installed tools can be detected automatically. Use Edit paths if a path is wrong. If Python or R is not installed, click Get started and configure it when you need to run analysis. Onboarding does not automatically install every tool.
To reopen the guide, press Ctrl+P, or Cmd+P on macOS, and search for Quick setup. Reopening it does not erase existing projects.
Step 3: Create a practice project.
After onboarding, the Projects screen appears. A project organizes conversations, files, and results for a piece of work. Keep this first exercise in a separate practice project.
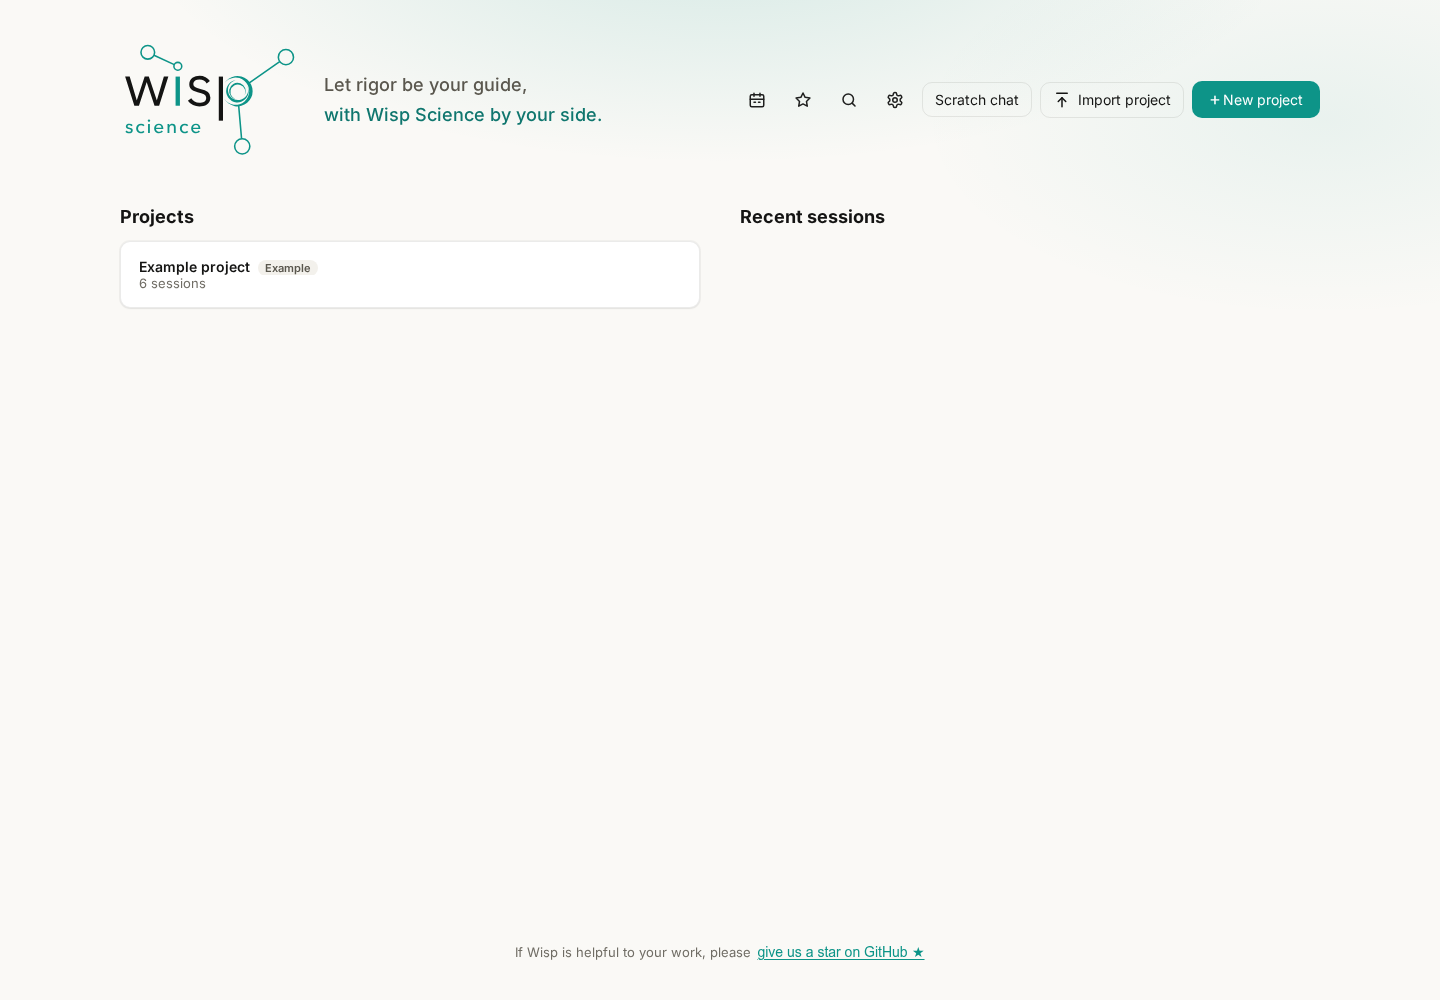
Figure 5: This screen uses demonstration data. A new installation may have an empty project list or show the bundled example. Click New project to create your own workspace.
Click New project, enter a name such as My first Wisp project, and choose a local folder for the exercise. A dedicated empty folder makes subsequent files easy to find.
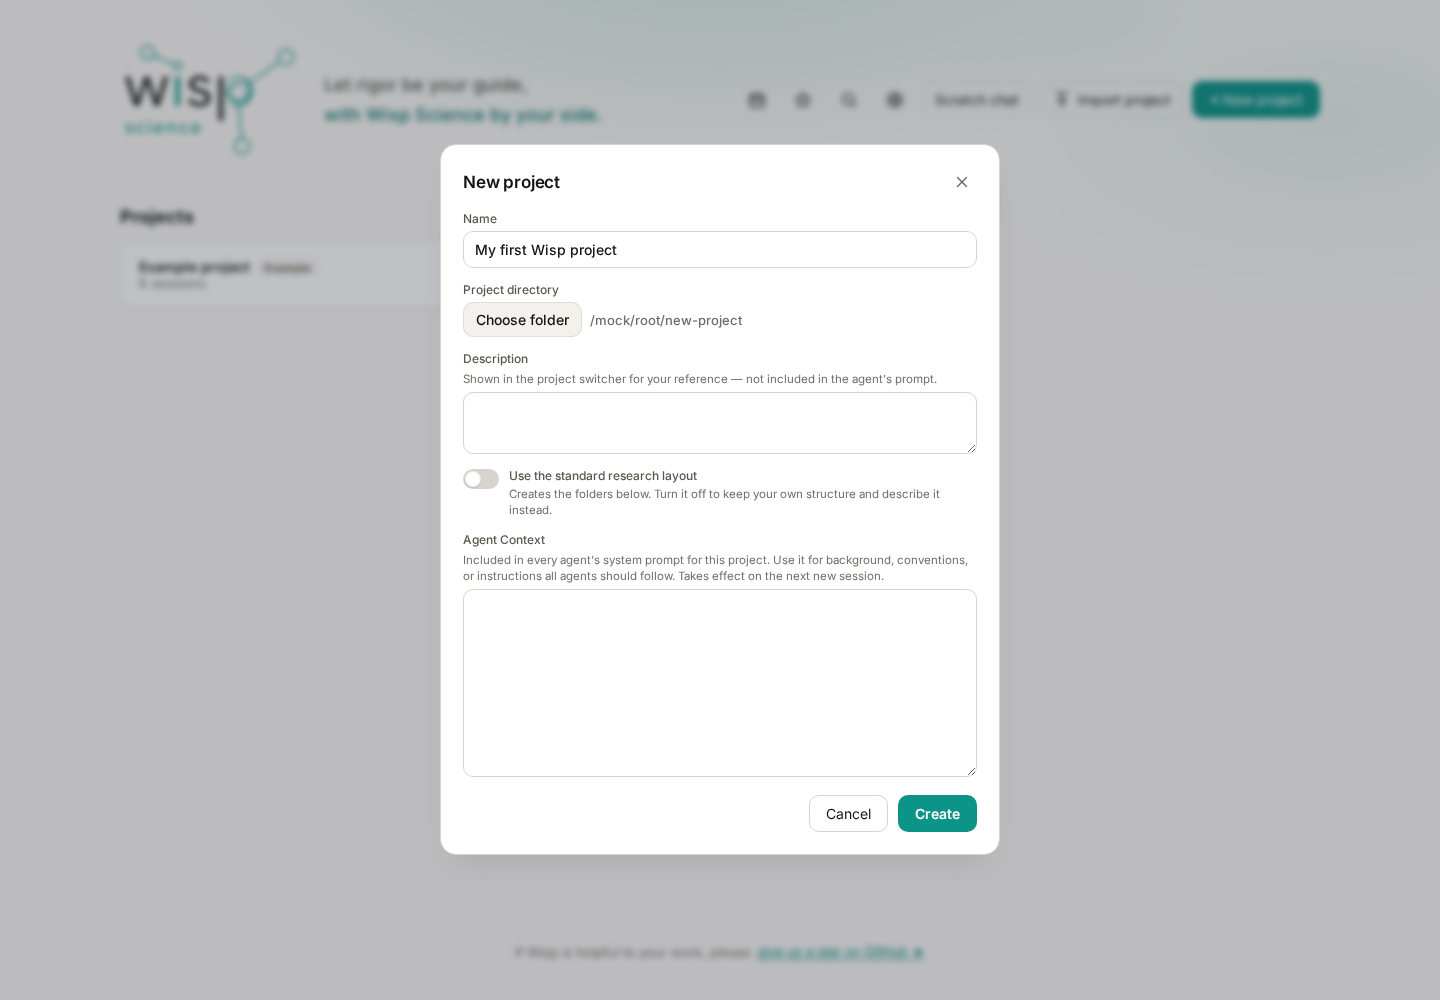
Figure 6: The name identifies the project in Wisp; the directory determines where files live. /mock/root/new-project is a simulated path. Select a folder on your own computer.
Leave the other fields and directory-layout options at their defaults for now. Confirm the name and folder, then click Create. Inside the project, conversations are listed on the left, the transcript occupies the center, and the message box is at the bottom. Use New session on the left for a new discussion.
Without an API key, you can read the built-in example from the Projects screen. Sending your own questions still requires a usable model.
Step 4: Select a model and send your first test message.
Check the model picker near the message box and choose a model you configured. If none is available, finish Settings → Models first, then return to the conversation.
Copy this message into the input box and click Send:
This is my first conversation test. Put samples A=10, B=20, and C=30 in a table, then report the sample count and mean. Answer only from these numbers. Do not read files, run code, or visit websites.
This exercise requires no extra data files or research tools. It checks message sending, model responses, and table rendering.
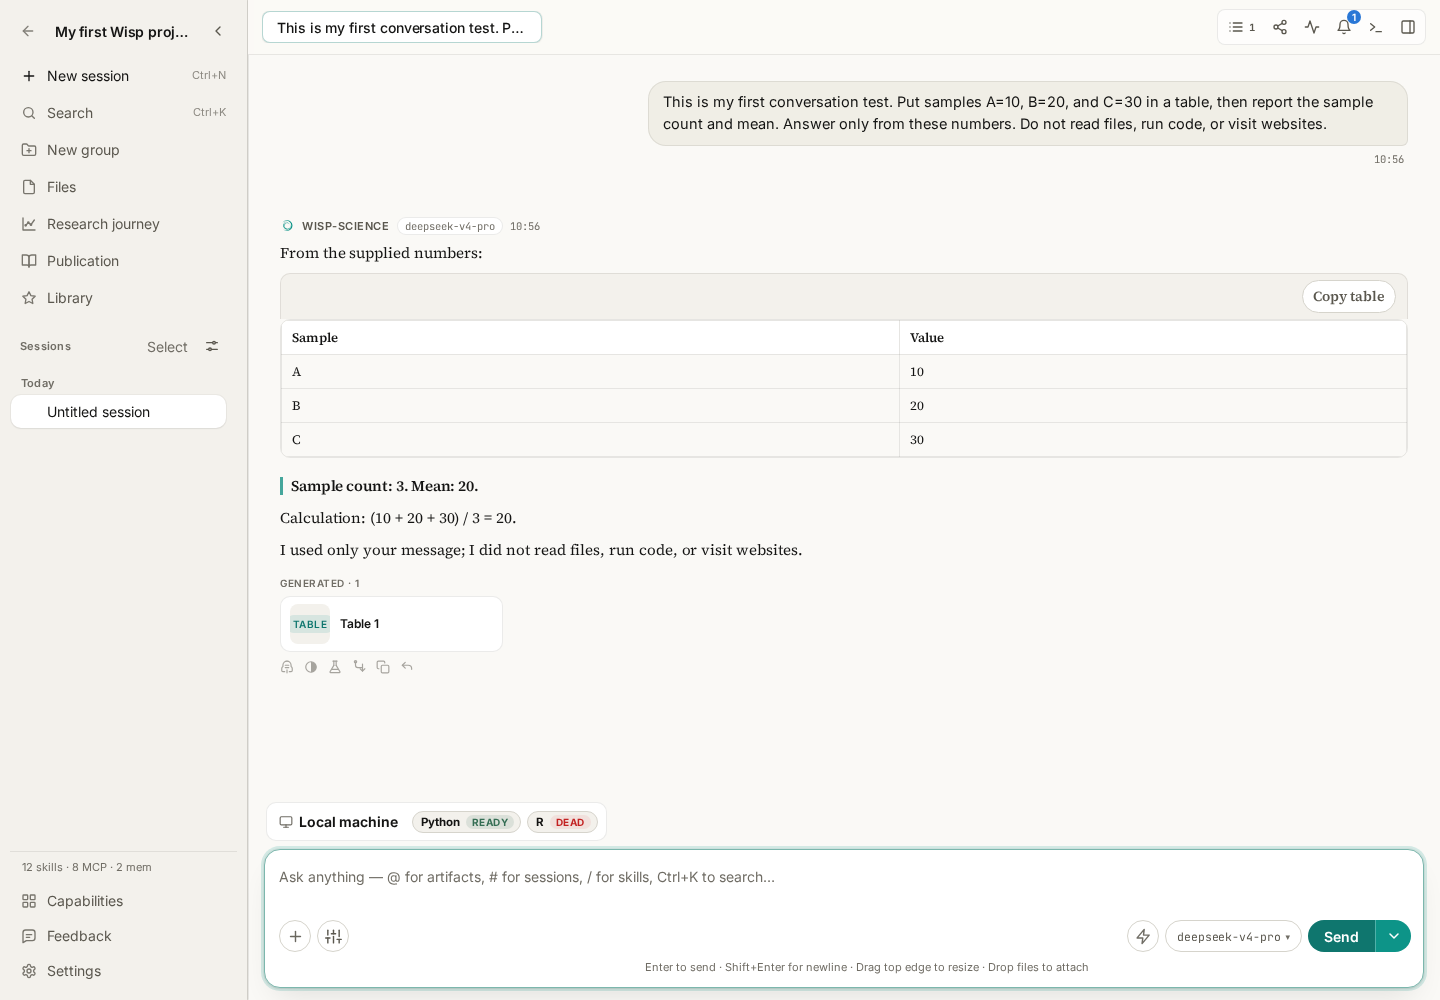
Figure 7: The screenshot uses a simulated model response to show where a successful answer appears. Your reply can use different wording, but the numbers should be checkable.
Check that:
- Your message appears in the conversation.
- The assistant completes a reply instead of remaining busy or showing an error.
- The table contains A, B, and C with values 10, 20, and 30.
- The sample count is 3 and the mean is 20:
(10 + 20 + 30) ÷ 3.
The response need not match the screenshot word for word. If a sample is missing or the arithmetic is wrong, ask the model to check the supplied numbers. Receiving a response and receiving a correct response are separate things to verify.
This only tests basic conversation. It does not test file access, Python/R, web retrieval, or server computation. The trajectory tutorial explains how to check whether tools actually ran.
Troubleshoot the step you are currently on.
| Symptom | Check first |
|---|---|
| The downloaded file is not an installable app | Did you download source or an update file? Does the installer match your system architecture? |
| Your provider is absent from onboarding | Choose Set up later, then add it in Settings → Models |
| The model picker has no usable model | Was the configuration saved, and has the current session selected it? |
| 401 / 403 | API key, model permissions, and account status |
| 404 or an HTML page in the response | Whether the API address, protocol, and model ID match |
| Connection failure or timeout | Connectivity to the provider and the model API proxy under Settings → General → Network |
| Python/R is missing | Complete the text-only test first; configure an interpreter when you need code execution |
After the first conversation, follow the tutorials that match your task: Models for API access, Browser for webpages, and MCP and Skills for research tools and reusable methods. Read Server Environment Setup when you need another machine.
Use the official releases for installers. See Basic Configuration for onboarding and settings details. These examples teach the workflow; they are not evidence of a live model test or completed research analysis.